
Hey there, and a warm welcome to “Seamless Node.js Deployment on cPanel: Your Step-by-Step Guide,” brought to you by all of us here at ProtozoaHost. We’re diving into the digital world where everything’s moving fast, but we’re here to slow things down a bit and make Node.js deployment a breeze for you. Whether you’re in Nepal or anywhere else on this big blue planet, we’ve crafted this guide with you in mind, making sure it’s packed with simple steps and easy-to-understand language.
At ProtozoaHost, we totally get that starting and running online projects can seem a bit daunting. That’s why we decided to put together this guide. We want to help you sail smoothly through the whole process of getting your Node.js projects up and running on cPanel, without having to scratch your head over the complex stuff.
So, let’s kick things off together. With ProtozoaHost by your side, you’re definitely not alone on this journey. We’re here to make the path to deploying your Node.js applications clear and simple, turning those awesome ideas of yours into live, kicking projects. Let’s dive in!
Getting Started with Node.js Deployment on cPanel with ProtozoaHost
Kicking off your Node.js deployment on cPanel is an exciting first step toward bringing your project to the world, and with ProtozoaHost by your side, it’s going to be a smooth ride. In this section, we’ll walk you through the essentials of getting everything set up and ready for deployment. From understanding the basics of cPanel to configuring your Node.js environment, we’re here to guide you every step of the way. Let’s embark on this journey together, making sure your Node.js deployment on cPanel is successful and stress-free

Step 1: How to Log Into Your cPanel with ProtozoaHost
Alright, let’s kick things off by getting into your cPanel, the heart of where all your hosting magic happens. Logging in is your first step toward setting up your Node.js deployment. With ProtozoaHost, you’ve got a couple of straightforward ways to do this, so let’s dive in:
The ProtozoaHost Way

First up, head over to the ProtozoaHost website. Look for something like “Client Area” or “cPanel Login” – it’s your golden ticket to the dashboard. Once you’re there:
- Put in your details: Grab the username and password you got from us when you signed up. If your password is playing hide and seek (aka you’ve forgotten it), hit the “Forgot Password?” link to reset it.

Dashboard – Node.js Deployment 
Services – Node.js Deployment 
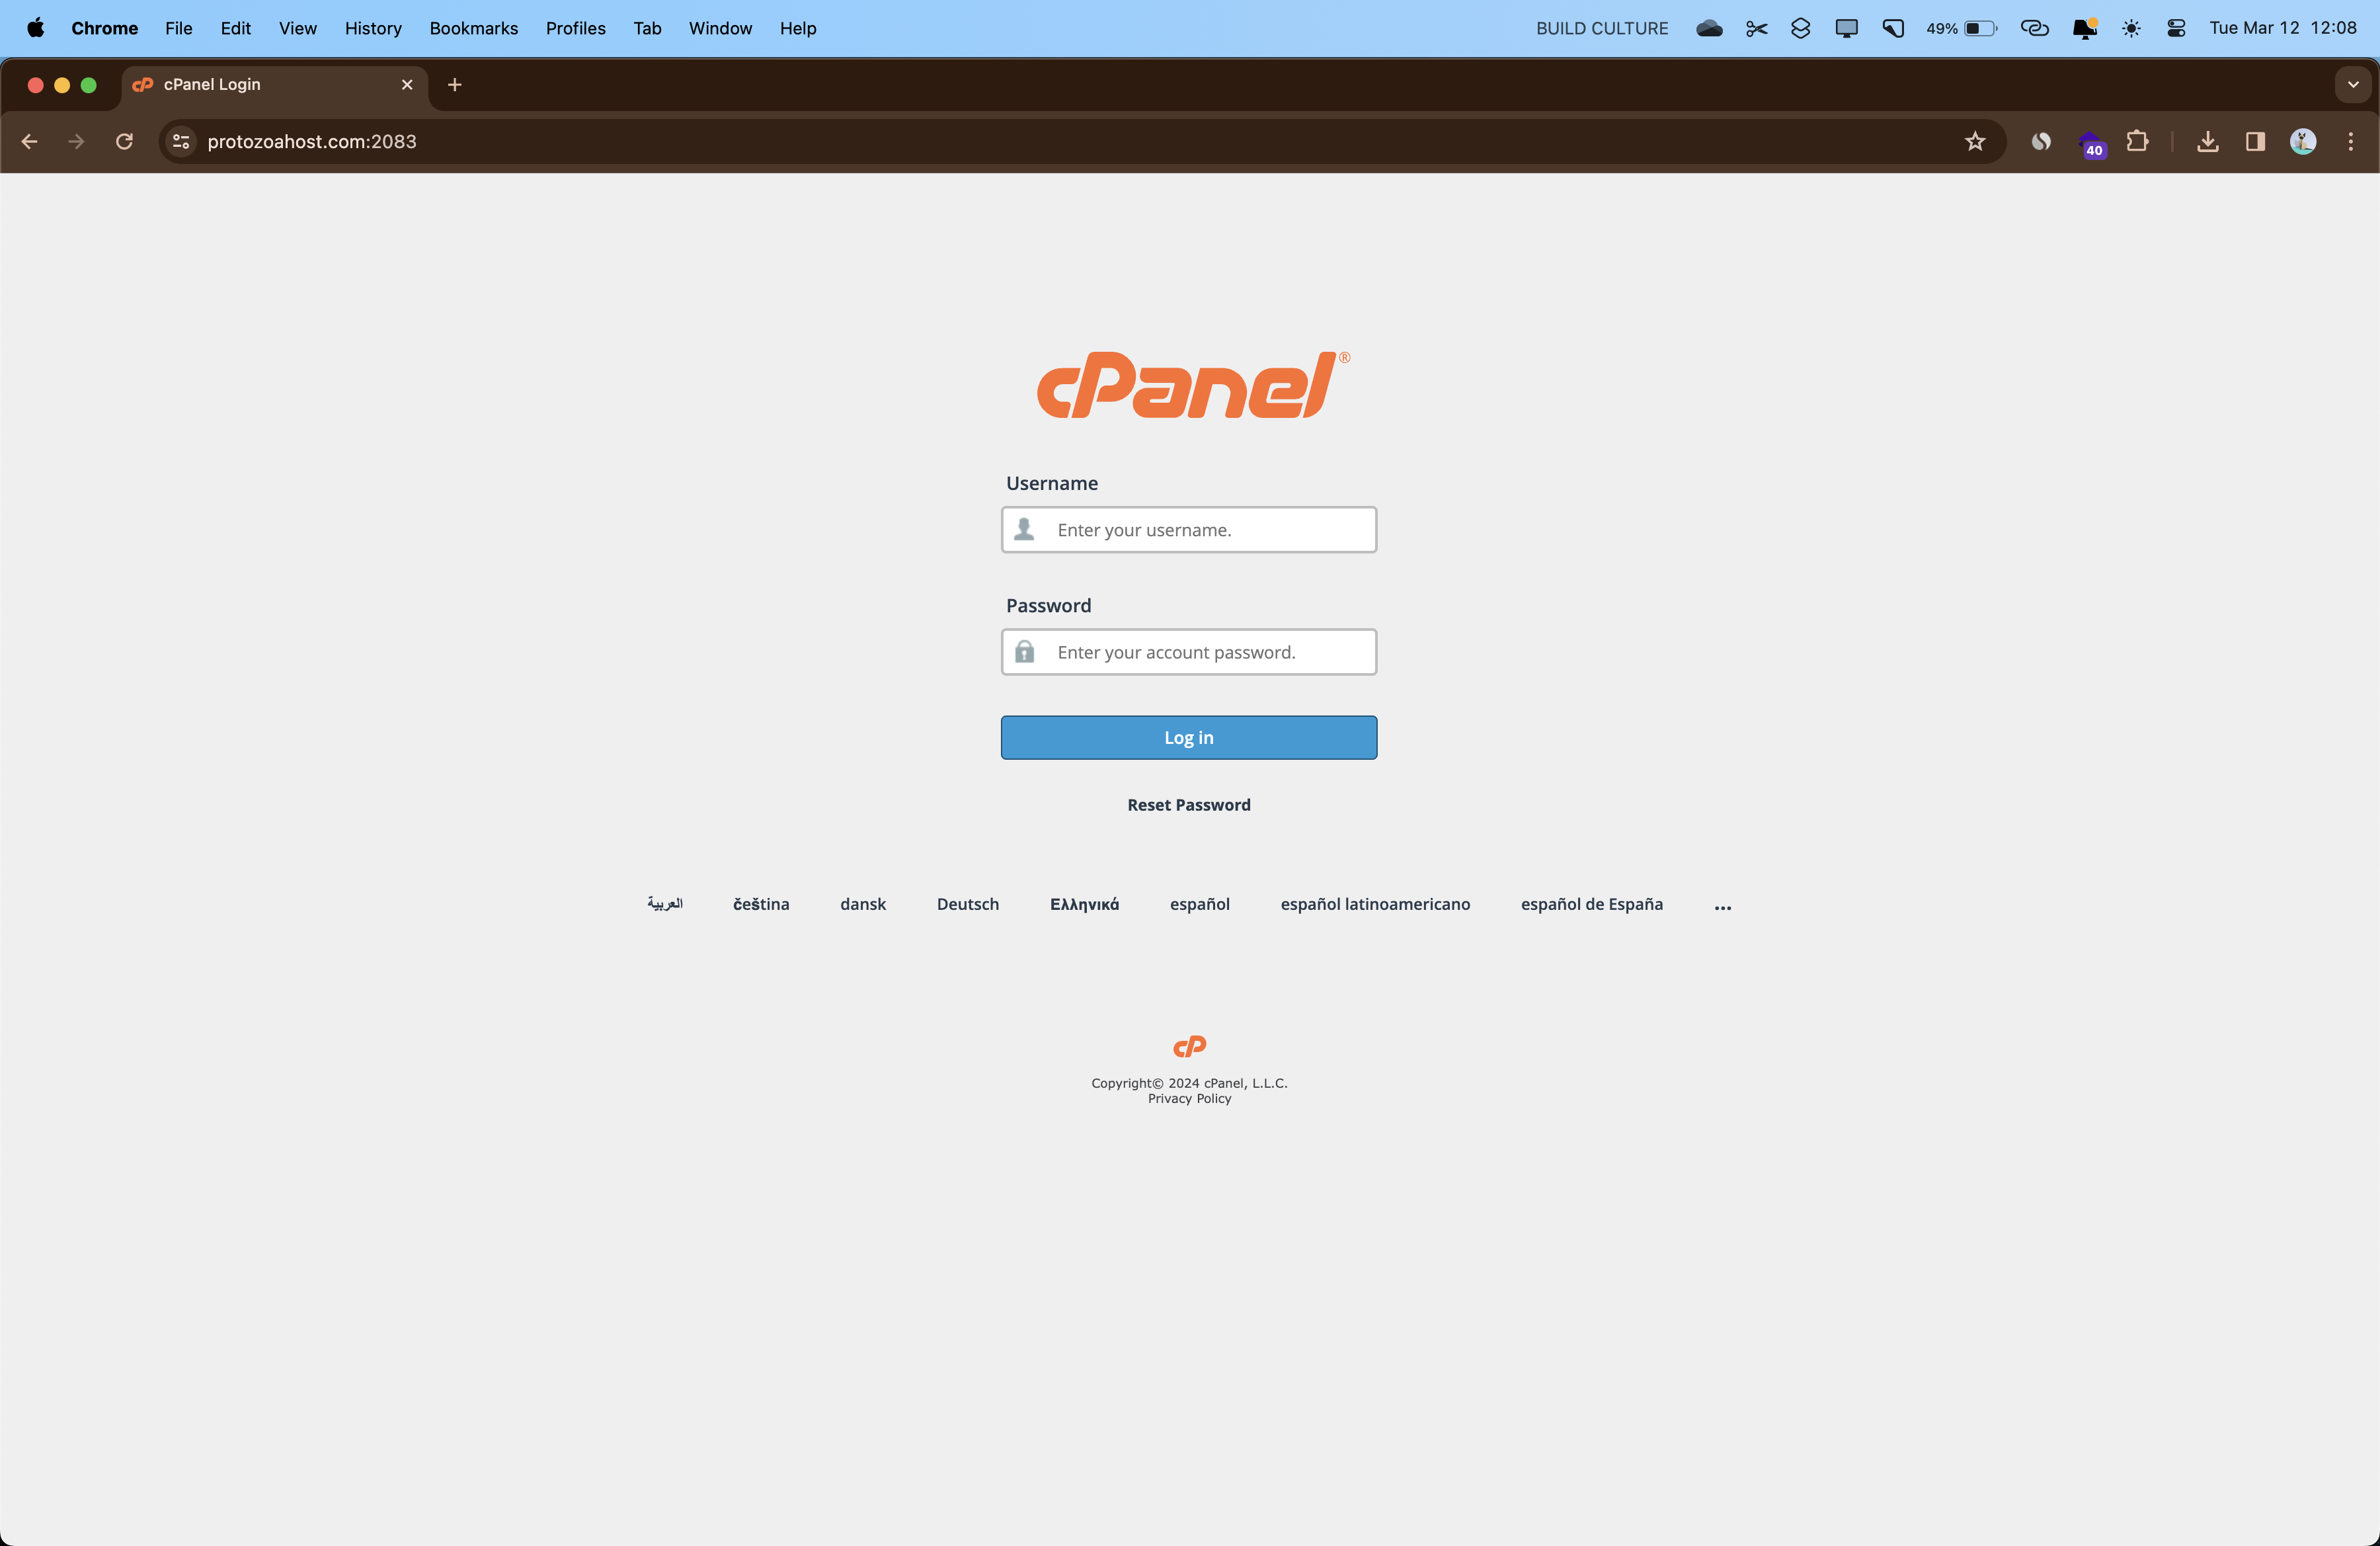
Login To cPanel – Node.js Deployment - Enter the command center: Logging in takes you straight to your cPanel dashboard. This place is mission control, where you’ll find everything you need to get your Node.js project off the ground.
The Direct Approach
Prefer to skip a step? You can get right to it by:
- Typing magic into your browser: Just punch in
yourdomain.com:2083into your browser’s address bar (swapyourdomain.comwith your actual domain, of course). It’s like using a secret backdoor that leads right to the login page. - Log in: Use the same username and password as before. If you’re stuck at the door, the “Forgot Password?” option is always there to help you back in.
And there you have it! Two simple ways to log into your cPanel with ProtozoaHost. Whether you’re a fan of going through our website or using the direct magic spell in your browser, you’re all set to start your Node.js deployment journey. Let’s get your project from idea to live, shall we?
Step 2: Finding the Node.js Selector in cPanel for Your Node.js Deployment
Great, you’re in! Now that you’ve successfully logged into your cPanel with ProtozoaHost, it’s time to move to the heart of the action. The next big step in getting your Node.js application up and running involves locating the Node.js Selector within cPanel. This tool is your best friend for setting up and managing your Node.js environment. Here’s how you can find it:
- Navigate to the Software Section: Once you’re in the cPanel dashboard, scroll down or look around for a section titled “Software” or something similar. The layout might vary slightly, but it’s there. This section is like a treasure trove for web developers, packed with all sorts of useful tools.
- Spot the Node.js Selector: In the “Software” section, keep an eye out for “Node.js Selector,” “Node.js Applications,” or a similarly named icon. This is where the magic happens for Node.js deployment. The Node.js Selector is your gateway to creating, managing, and deploying your Node.js applications right from cPanel.
- Click to Open: Once you’ve found the Node.js Selector, go ahead and click on it. You’re about to enter the world where Node.js projects come to life. Here, you can set up new applications, configure existing ones, and much more.
- Familiarize Yourself: Take a moment to get comfortable with the Node.js Selector interface. You’ll see options to create new Node.js applications, manage dependencies, and set environment variables, among other things. It’s your control panel for all things Node.js on your hosting account.
By locating and accessing the Node.js Selector in your cPanel, you’ve taken a crucial step towards deploying your Node.js application. With ProtozoaHost, you’re not just working on your project; you’re setting it up for success. So, take a deep breath, and let’s dive into the next steps together. Your Node.js project is about to take shape!

Step 3: Setting Up Your New Node.js Application in cPanel
Alright! You’ve found the Node.js Selector inside your cPanel with ProtozoaHost, which means you’re now standing at the doorstep of bringing your Node.js project to life. Let’s walk through creating a new Node.js application within your cPanel, step by step. This is where your idea starts taking shape in the real world.
- Initiate a New Application: Inside the Node.js Selector area, you’ll see an option to “Create Application” or something along those lines. Click it to start the process. This is your first official step towards making your Node.js project a reality.

Create Node.Js Application – Node.Js Deployment - Fill in the Application Details: You’ll be prompted to enter some details about your new application. This usually includes:

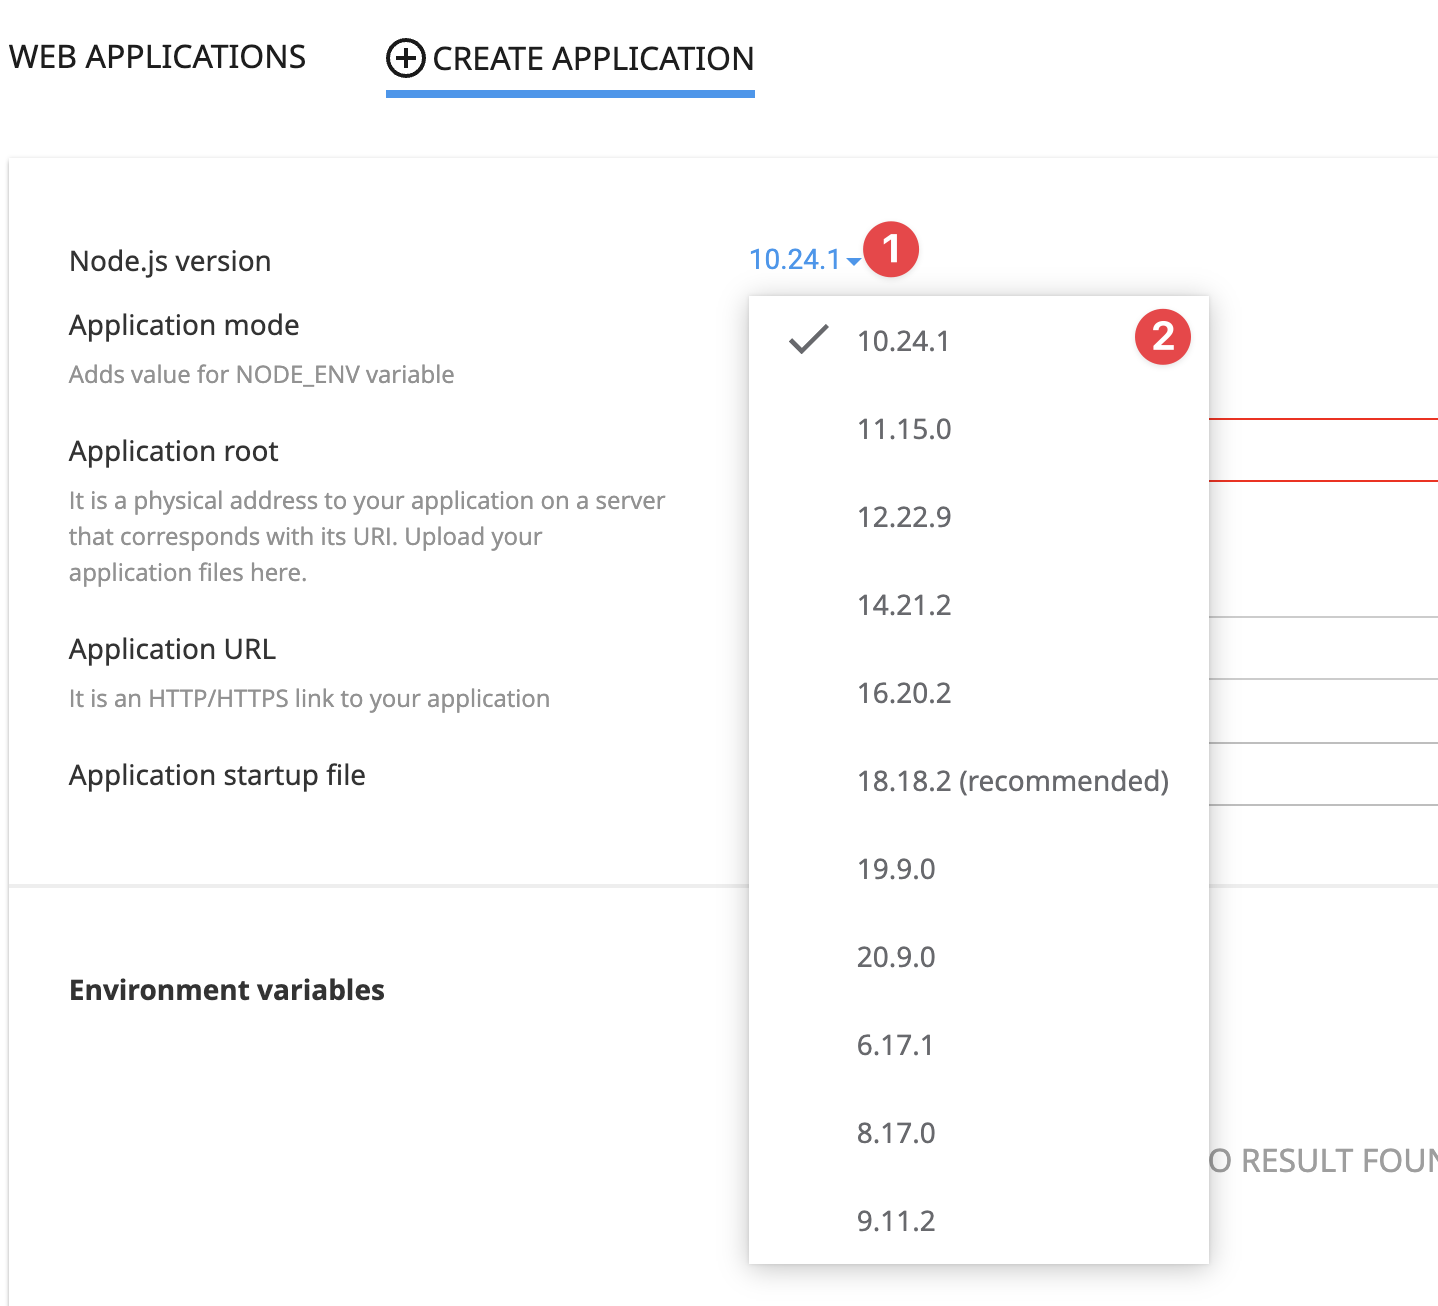
Application Setup – Node.Js Deployment - Node.js Version: Select the version of Node.js you want to use. It’s important to choose a version compatible with your application. If you’re unsure, the latest stable version is a safe bet.
Node .Js Version – Node.Js Deployment - Application Root: This is where your application will live on your hosting account. You can specify a directory or accept the default suggestion. Make sure it’s a place you’ll remember – it’s going to be your project’s home.

Application Root – Node.Js Deployment - Application URL: Here, you’ll define the URL where users can access your application. It might be a subdomain or a specific directory on your site.

Node JS App URL – Node.Js Deployment - Application Startup File: This is the entry point for your Node.js application, such as
app.jsorserver.js. Ensure this matches the main file of your Node.js project.
Node App Startup File – Node.Js Deployment
- Node.js Version: Select the version of Node.js you want to use. It’s important to choose a version compatible with your application. If you’re unsure, the latest stable version is a safe bet.
- Set Up Environment Variables: If your application requires environment variables (like database URLs or secret keys), you can set them up in this step. There’s usually a section for adding key-value pairs. These variables are crucial for keeping sensitive information out of your codebase.
- Create the Application: Once you’ve filled in all the details, hit the “Create” button. The cPanel Node.js Selector will work its magic, setting up a new Node.js environment tailored to your application’s needs.

Create Node App – Node.Js Deployment
Verify Everything is Working: After the application is created, it’s a good idea to check that everything’s set up correctly. You might have a URL to visit or logs to inspect. If it’s all looking good, you’re on the right track.

Step 4: Crafting Your package.json in the File Manager for Your Node.js Application
You’ve got your Node.js application set up in cPanel with ProtozoaHost, which is fantastic! The next crucial step in bringing your project to life involves creating a package.json file. This file acts as the blueprint for your application, detailing its dependencies, scripts, and much more. Here’s how you can create your package.json directly in the cPanel File Manager:
- Navigate to the File Manager: In your cPanel dashboard, locate and open the “File Manager.” This is where all the files for your websites and applications are stored and managed. You’re looking for the application root directory you specified when creating your Node.js application.

File Manager - Open Your Application’s Root Directory: Once in the File Manager, find the directory where your Node.js application resides. This is the path you chose during setup in Step 3. Double-click on the folder to open it.

Application Root - Create a New File: Within your application’s root directory, look for the option to create a new file. This is usually found as a “+ File” or “New File” button at the top of the File Manager interface.

Create File – Node.JS Deployment - Name Your File
package.json: When prompted for a file name, enterpackage.jsonand confirm to create the new file. This will be your application’s manifest file, where you define various settings and dependencies.
Package.JSON - Edit
package.jsonFile: After creating thepackage.jsonfile, you’ll need to edit it to include your application’s details. Look for the edit option (usually indicated by a pencil icon or an “Edit” button), which will open the file in a text editor within your browser.
edit package.json - Add Your Application Details: In the editor, you’ll input the necessary information for your application. At a minimum, your
package.jsonshould include thename,version, andmainfields, along with any dependencies underdependencies. Here’s a simple example to get you start.
{
  "name": "app",
  "version": "1.0.0",
  "description": "My App",
  "main": "app.js",
  "scripts": {
    "test": "echo \"Error: no test specified\" && exit 1"
  },
  "author": "",
  "license": "ISC"
}
- Save Your Changes: Once you’ve added your application’s details to the
package.jsonfile, make sure to save your changes. There’s typically a save button in the editor interface.
By creating and configuring your package.json file, you’ve laid the groundwork for your Node.js application to understand what libraries it needs and how it should start. This is a key step in ensuring your application runs smoothly and efficiently on ProtozoaHost’s hosting environment. Next, we’ll move on to installing your Node.js application’s dependencies and getting everything ready for launch. Keep up the great work!
Step 5: Installing npm Dependencies via Node.js Selector
With your package.json now in place, detailing your Node.js application’s dependencies and setup, it’s time to install those dependencies using npm (Node Package Manager). This step is crucial for ensuring all the necessary libraries and frameworks your application relies on are properly installed and up-to-date. Here’s how you can do this through the Node.js Selector in cPanel with ProtozoaHost:
- Head Back to Node.js Selector: Navigate to the Node.js Selector within your cPanel dashboard, where you initially set up your Node.js application. You’re returning to the control center for your Node.js environment.
- Select Your Application: You should see a list of your Node.js applications. Find the application you’re working on — it should be listed by the root directory you chose during its setup. Click on it to access the application’s specific settings and tools.

Edit App - Open the npm Section: Within your application’s settings, look for the npm section or a button that says “Run npm Install” or something similar. This section or option is your gateway to managing npm dependencies directly from cPanel.
- Run npm Install: Click on the option to run
npm install. This command will automatically look at yourpackage.jsonfile, identify all the dependencies listed underdependenciesanddevDependencies, and begin installing them. It’s like hitting the “magic button” that gathers all the building blocks your application needs to run.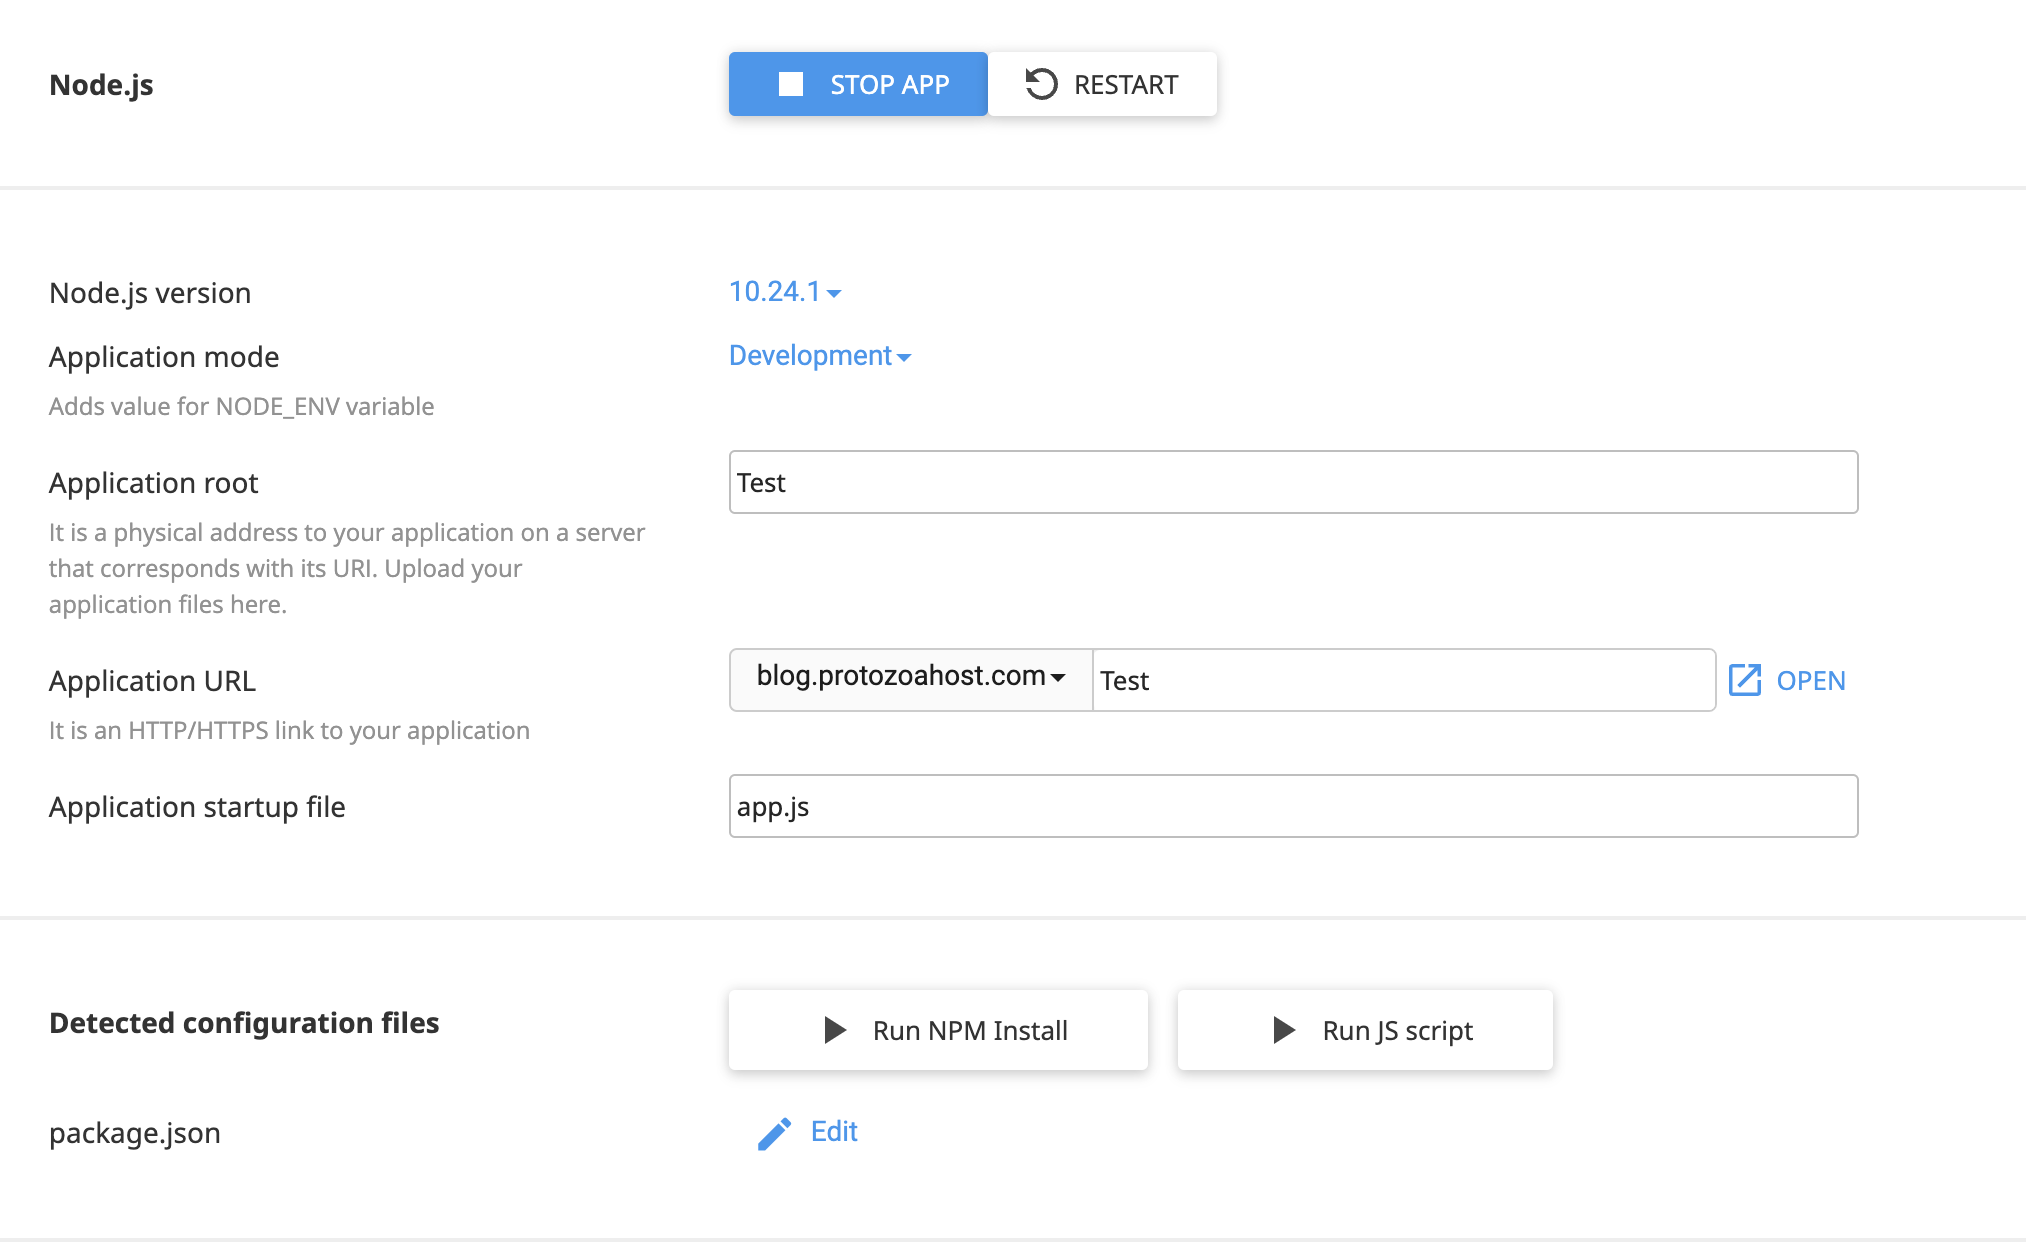
npm Install - Monitor the Process: Depending on the number and size of dependencies, this process might take a few minutes. You should see some form of progress indicator or log output showing the installation progress. It’s important to ensure this process completes successfully. If there are any errors, they’ll likely be shown here, giving you clues about what might need fixing.

Monitor Installation 
NPM Installed - Verify Installation: Once the npm install process is complete, your application’s dependencies are all set up. It’s a good idea to check that everything is installed correctly. You can do this by looking for a “Node.js App Details” section or similar, where you might find information about the installed dependencies.
And just like that, you’ve crossed another major milestone in getting your Node.js application ready for the world on ProtozoaHost. By installing your npm dependencies through the Node.js Selector, you’re ensuring your application has all it needs to operate smoothly. Up next, we’ll guide you through the final steps to make your application accessible to users. Keep going — you’re almost there!
Step 7: Activating the Virtual Environment for Your Node.js Application
Fantastic progress! Now that your Node.js application is set up and your npm dependencies are installed, it’s time to activate the virtual environment for your application on cPanel. This virtual environment is a secluded space on your server where your Node.js application will live and run, ensuring that it operates smoothly without interference from other server processes.
Here’s how you can activate the virtual environment for your Node.js application in cPanel:
- Locate the Virtual Environment Command: Within the Node.js Selector for your application, you should see a section with a command prompt or a piece of code that starts with
sourcefollowed by a file path. This command is what you’ll use to enter the virtual environment.
Virtual Environment - Copy the Command: There should be a ‘Copy’ option near the command, or you can manually select the text and copy it. This is the specific command you’ll need to use to activate your Node.js application’s virtual environment.
- Access the Terminal: In cPanel, you can use the built-in Terminal feature to run commands. Look for the ‘Terminal’ icon in your cPanel dashboard and open it. The Terminal will allow you to interact with your hosting account using the command line.
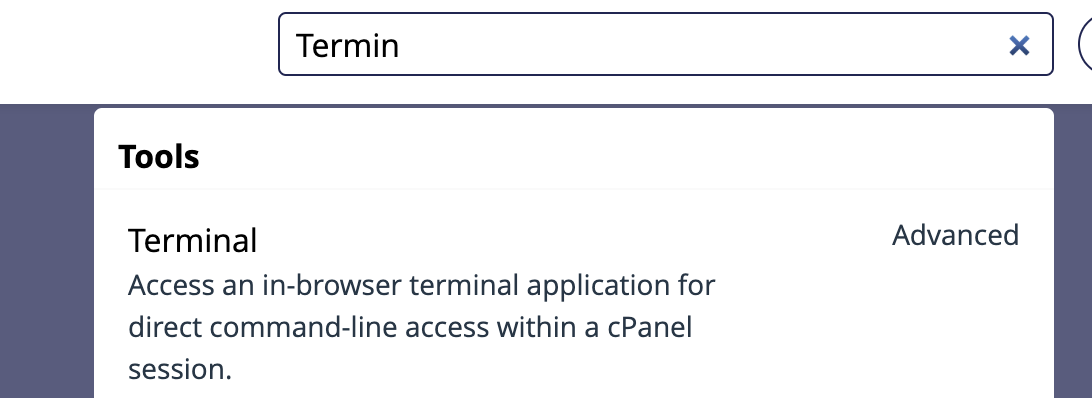
Terminal - Paste and Run the Command: Once in the Terminal, paste the command you copied earlier into the command line and press Enter. This will activate the virtual environment for your Node.js application.

In virtual environment - Verify Activation: After running the command, you should see that the terminal prompt changes slightly, indicating that you are now within the virtual environment. You might notice the path included in the prompt or other visual cues that confirm you’re in the right place.
By activating the virtual environment, you’ve provided your Node.js application with a secure and stable environment to run. It’s like giving your app its own dedicated room in the vast hotel of ProtozoaHost’s server space. With this space, you can manage your app’s runtime and dependencies separately from other server software, ensuring that your Node.js application has everything it needs and nothing it doesn’t.
Next up, you’ll be looking at managing your app within this environment, making sure it’s running correctly and accessible to your users. You’re doing great — keep going!
Conclusion
As we wrap up this guide on Node.js deployment on cPanel with ProtozoaHost, you’ve traveled the path from initial login to activating the virtual environment for your application. You’ve set the stage for success by laying down each block with care — establishing a strong foundation with cPanel, setting up your application, and preparing the environment where your Node.js app can thrive.
Remember, the journey doesn’t end here. With your application now nestled in its virtual environment, the ongoing adventure involves monitoring its performance, updating it with new features, and scaling it to meet user demand. ProtozoaHost is with you every step of the way, offering the tools and support to ensure that your application not only runs, but also excels.
Now, your Node.js project is more than lines of code; it’s a living, breathing creation on the web. It’s time to step into the next chapter — where you engage with users, gather feedback, and iterate to make your application truly outstanding. Keep building, keep learning, and most importantly, keep sharing your digital creation with the world.
Congratulations on reaching this point in your Node.js deployment journey with ProtozoaHost. Here’s to many successful launches and the continuous growth of your applications!