
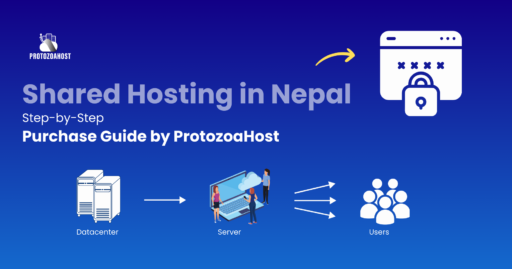

Shared hosting by Protozoa Host is the quintessential web hosting solution for individuals and small businesses in Nepal seeking an affordable, yet robust online foothold. As a leading web hosting provider, Protozoa Host offers shared hosting that stands out for its cost-efficiency, making it a preferred choice for those starting out. By choosing Protozoa Host, users benefit from high-speed optimized servers, ensuring fast website load times, and an advanced security fortress that guards against online threats. This perfect blend of performance and security, coupled with dynamic resource scaling, positions Protozoa Host at the forefront of shared web hosting services in Nepal, offering an accessible path to a powerful and reliable digital presence.
Easy Steps to Secure Your Shared Hosting Plan with ProtozoaHost
If you’re looking to make your mark on the digital world with a website, finding the right shared hosting plan is a crucial step. Let’s walk through the process of navigating the ProtozoaHost website to locate their shared hosting options, ensuring you start off on the right foot.
Step 1: Accessing ProtozoaHost Kick off your journey by launching your preferred web browser and typing in the ProtozoaHost website address. Hit enter, and you’ll be whisked away to the homepage of what could be the new digital home for your website.

Step 2: The Welcome As you land on the ProtozoaHost homepage, take a moment to absorb the clean layout and vibrant visuals that greet you. The interface is designed to be not just pleasing to the eye but also user-friendly, so you can find what you need with ease.
Step 3: Finding Shared Hosting Now, let’s find those shared hosting plans. You have a couple of straightforward options to get there:
- Via the Menu: Look towards the top of the page where the navigation menu sits like a crown. Here, you’ll find ‘Shared Hosting’ neatly listed among the options. Move your cursor over the words, and a click will soon reveal the treasures that lie within.

- Scrolling Adventure: If you’re not in a rush and prefer a little scrolling adventure, gently glide down the homepage. As you journey through the landscape of ProtozoaHost’s offerings, you’ll discover sections detailing various hosting services. The ‘Shared Hosting’ section will call out to you with its inviting ‘View Plans’ button.

- Shortcut Buttons: In some instances, ProtozoaHost offers a quicker path. Shortcut buttons or banners may be present, boldly inviting you to take a closer look at their hosting plans. Keep an eye out for these as they can be your express lane to shared hosting details.
Step 4: Select Your Destination Upon finding the ‘Shared Hosting’ section or menu item, a single click is all it takes to transport you to a dedicated page. Here, ProtozoaHost lays out its shared hosting plans, each with its own set of features and benefits clearly displayed to help you make the right choice.

Step 5: Explore the Shared Hosting Page You’ve arrived at the shared hosting page – your potential launchpad. Take your time to survey the landscape here. This page is the library of shared hosting plans, where details matter. Each plan is outlined with care, providing you with information on storage, bandwidth, security features, and much more.

Once you’ve navigated to the shared hosting page on ProtozoaHost, you’re presented with a clear and compelling overview of their cPanel Shared Hosting offerings. The page is designed with the user in mind, providing all the necessary information at a glance and emphasizing the ease and reliability of their service with a user-friendly cPanel interface.
When you’re ready to delve into the specifics of the shared hosting packages, you’ll find the ‘View Package’ button, which is impossible to miss – it’s your gateway to the detailed offerings. By clicking on this button, you are taking the next step towards actualizing your website’s potential. It signifies that you’re not just browsing, but you’re about to embark on a journey with ProtozoaHost as your guide.
Upon selecting ‘View Package’, you will be led to a comprehensive breakdown of the shared hosting plans available. Here, each plan is meticulously detailed with features, pricing, and the various benefits that come with choosing ProtozoaHost. It’s an important moment, as you’re about to make a decision that will support your website’s infrastructure and influence its growth.
ProtozoaHost’s shared hosting page and the ‘View Package’ button are more than just parts of a website; they represent the first tangible steps in a partnership between you and your hosting provider. It’s where expectations are set, and service commitments are made, ensuring that you have all the tools needed for a successful online presence.

After clicking on the ‘View Package’ button on ProtozoaHost’s shared hosting page, you’ll be taken to a detailed overview of the various shared hosting packages they offer. Each package is tailored to suit different needs and budgets, ensuring that there’s a perfect fit for everyone – from students just starting out with their first website to SMEs looking for extensive functionalities and resources.
The packages are clearly outlined, allowing you to compare them side by side. They are categorized primarily as cPanel – Learner, cPanel – Basic, cPanel – Power, and cPanel – Unlimited, with the price per month prominently displayed at the top, so you can immediately gauge which fits your budget:
- cPanel – Learner: This is the most cost-effective plan, ideal for beginners and comes with a single domain, five subdomains, and 3 GB storage, among other features, all the essentials you need to get started.
- cPanel – Basic: Stepping up, this plan is crafted for startups and comes with additional resources including two domains, 10 GB storage, and 5 MySQL databases, making it a robust option for growing sites.
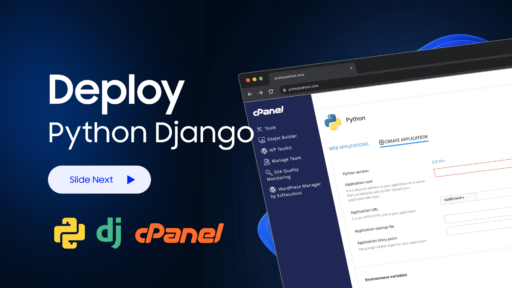
- cPanel – Power: For businesses in need of more horsepower, this plan offers five domains, unlimited subdomains, and 20 GB storage, plus performance enhancements like 2 GB RAM and Python & Node JS support.
- cPanel – Unlimited: The premium plan, catering to more established sites that demand high performance, offering unlimited domains and storage, 3 GB RAM, and additional features like a malware scanner for enhanced security.
Each plan details the features offered, including the number of email accounts, FTP accounts, database support, bandwidth, and the performance level you can expect. Additionally, value-added services such as 24/7 support, a free SSL certificate, and access to a control panel are highlighted, showcasing ProtozoaHost’s commitment to providing comprehensive services. For those who need it, weekly backups are also available, ensuring that your data is always secure.
Selecting the right plan will be based on the specific needs of your website and your future growth plans. With clear, concise, and crucial information at your fingertips, ProtozoaHost ensures a transparent decision-making process, allowing you to choose the most suitable package for your web hosting needs in Nepal.

Step-by-Step Tutorial: Purchasing the Shared Web Hosting Plan from ProtozoaHost
Upon selecting the ‘Buy cPanel Basic’ option from ProtozoaHost’s array of shared hosting plans, you’re directed to a pivotal step in your web hosting purchase: choosing a domain. This page is where your brand gets its name in the digital realm, and ProtozoaHost offers a streamlined process to either secure a new domain, transfer an existing one, or update the nameservers for a domain you already own.
Here’s how you can navigate through this step:
- Register a New Domain: If you’re starting fresh, you can register a new domain by entering your desired domain name in the search box. Choose your preferred extension from the dropdown menu (like .com, .net, .org, etc.), and click ‘Check’ to see if it’s available.
- Transfer Your Domain from Another Registrar: If you have a domain with another registrar and want to move it to ProtozoaHost, select this option. You will need to enter the domain you wish to transfer and follow the steps for transferring, which usually includes unlocking the domain and obtaining a transfer code from your current registrar.
- Use an Existing Domain and Update Nameservers: If you intend to keep your domain registered with another provider but want to use ProtozoaHost’s hosting services, choose this option. You’ll be asked to enter your existing domain and later update its nameserver records to point to ProtozoaHost’s servers.
Each option is designed to integrate seamlessly with ProtozoaHost’s hosting services, ensuring that whether you’re a newcomer to the web or looking to expand your digital footprint, the transition is as smooth as possible. Once you’ve made your domain choice, ProtozoaHost will guide you through the rest of the setup process, leading you one step closer to having your website up and running.

Let’s Suppose We Have Our Own Domain Instead of Registering New Domain For Our Web Hosting

Choosing the Right Billing Cycle for Your Shared Hosting Plan with ProtozoaHost
When signing up for a shared hosting plan with ProtozoaHost, one of the options you’ll encounter is choosing a billing cycle. This determines how often you will be billed for your hosting service. ProtozoaHost offers a variety of billing cycles to suit your needs and budget, and this blog post will explain your options and help you choose the right one.
The Billing Cycle Options on ProtozoaHost
The screenshot you sent shows the billing cycle options available on ProtozoaHost’s shared hosting plan page. Here’s a breakdown of each option:
Quarterly: This option bills you every three months.
Semi-Annually: This option bills you every six months.
Annually: This option bills you once a year.
Biennially: This option bills you every two years.
Triennially: This option bills you every three years.

Budget: Choosing a longer billing cycle, such as annually or biannually, will typically come with a discount compared to the monthly price. However, this also means you will be prepaying for a longer period of service.
Commitment: If you are unsure about your long-term hosting needs, you may prefer a shorter billing cycle, such as monthly, to provide more flexibility.
Payment preferences: Consider how often you would prefer to make payments. If you prefer to avoid frequent small payments, a longer billing cycle might be more convenient.
Additional Considerations
ProtozoaHost offers a discount for longer billing cycles. As you can see in the screenshot, the price per month decreases as you choose a longer billing cycle. For example, the monthly cost is ₹499.00 for the quarterly cycle, but only ₹458.92 for the annual cycle.
You can change your billing cycle later. If you choose a billing cycle but later decide you want to switch, you can usually do so from your ProtozoaHost account control panel.
Now Let’s Select Annual Billing and Continue
Great Choice! Selecting Annual Billing for Your ProtozoaHost Shared Hosting
In the previous section, we discussed the different billing cycles offered by ProtozoaHost for their shared hosting plans. You’ve chosen the annual billing cycle, which is a great selection for those who value long-term commitment and cost savings.
Here’s a quick recap of the benefits of choosing the annual billing cycle:
- Cost-effective: As you saw on the previous page, choosing the annual billing cycle typically comes with a significant discount compared to the monthly price. This can lead to substantial savings in the long run.
- Reduced payment hassles: With annual billing, you only need to make one payment per year, eliminating the need for frequent monthly payments. This can simplify your budgeting and financial management.
- Peace of mind: Knowing your web hosting is covered for a full year can provide peace of mind and allow you to focus on building and managing your website without worrying about service interruptions due to missed payments.

- Save 30% on Shared Hosting with ProtozoaHost! Use code proto30 at checkout to get a discount on their reliable and affordable shared hosting plans.

Here’s a guide on how to fill out the signup form and proceed to checkout:
1. Personal Information:
- First Name: Enter your first name in the designated field.
- Last Name: Enter your last name in the designated field.
- Company Name (Optional): This field is optional. You can enter your company name if applicable, or leave it blank.
- VAT Number (Optional): This field is also optional. You can enter your VAT number if required, or leave it blank.
2. Contact Information:
- Email Address: Enter your valid email address in this field. This email address will be used for communication from ProtozoaHost, including important account information and renewal notices.
- Phone Number: Enter your phone number, including the country code, in the designated field.
3. Account Security:
- Password: Create a strong password for your account. A strong password is typically at least 8 characters long and includes a combination of uppercase and lowercase letters, numbers, and symbols.
- Confirm Password: Re-enter your chosen password in this field to confirm it matches the one entered previously.

Order Summary:
- This section provides an overview of your chosen shared hosting plan, including the plan name (e.g., cPanel Basic), billing cycle (e.g., Annual), and discount applied (e.g., 30% off with code “proto30”).
- You can also see the total cost of your plan after the discount is applied.
Additional Notes:
- This section allows you to enter any additional notes or information you want to include with your order. For example, you could mention any specific requests or preferences you have regarding your hosting service.
Terms of Service:
- Before proceeding, you must agree to ProtozoaHost’s terms of service. These terms outline the legal agreement between you and ProtozoaHost regarding the use of their services.
- It’s important to carefully review these terms before checking the box to ensure you understand and agree to their policies.
Checkout Button:
- Once you have reviewed the order summary, entered any additional notes (optional), and agreed to the terms of service, you can click the “Checkout” button to proceed to the payment gateway.
Payment Gateway:
- Upon clicking “Checkout,” you will be directed to the payment gateway, a secure platform where you can enter your payment information to complete your purchase.
- ProtozoaHost offers various payment methods, including ebanking/Khalti. Choose your preferred method and enter your payment details carefully.
Completing the Purchase:
- Once you’ve entered your payment information and confirmed the details, you can typically finalize the purchase by clicking a button like “Pay Now” or “Complete Order.”
Congratulations!
By following these steps, you will have successfully purchased your ProtozoaHost shared hosting plan. You should receive a confirmation email with your account details and login information shortly.
Additional Notes:
- Make sure you have a stable internet connection throughout the checkout process to avoid any interruptions.
- Double-check your order details and payment information before completing the purchase to ensure accuracy.
- If you encounter any difficulties during checkout, ProtozoaHost offers 24/7 customer support to assist you.

Email Verification:
Next, Payment Gateway
For Khalti:
For eSewa: